How to Build a Gaming PC Budget That Dominates
August 25, 2026 15 min read 2,906 words
Unlock high-performance gaming without breaking the bank with our comprehensive, step-by-step budget PC building guide.
Start Your Build Now
Demystifying Budget Gaming PC Components
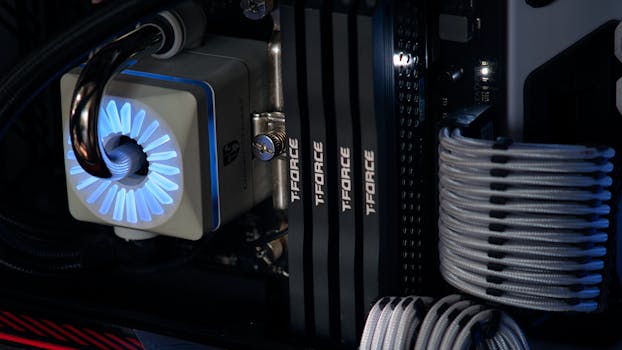 Photo: Ivelin Donchev / Pexels
Building a gaming PC on a budget might seem like a daunting task, but with a strategic approach, it's entirely achievable to create a powerful machine without emptying your wallet. The secret lies in understanding which components offer the best performance-to-price ratio and where you can judiciously save money. We're not just talking about finding the cheapest parts; we're talking about smart compromises that still deliver an excellent gaming experience.
At the heart of any gaming PC are the CPU (Central Processing Unit) and the GPU (Graphics Processing Unit). For a budget build, these are the components where you'll want to allocate the largest portion of your funds. A common misconception is that you need the absolute latest and greatest to game effectively. This simply isn't true. Many mid-range CPUs from previous generations, like an Intel i5 or AMD Ryzen 5, still offer fantastic performance for most modern games when paired with a capable GPU. The same goes for GPUs; instead of aiming for an RTX 4080, consider a slightly older but still potent card like an RTX 3060 or an AMD RX 6600 XT. These cards can handle 1080p gaming at high settings with ease, and often even 1440p with some compromises.
Next up is the motherboard. While it might seem tempting to splurge on a high-end board, a budget build typically benefits from a more modest option. Look for motherboards that support your chosen CPU socket (e.g., AM4 for older Ryzens, LGA1200 for older Intels) and have essential features like PCIe 4.0 (if your GPU supports it) and enough RAM slots. You don't necessarily need Wi-Fi 6E or a dozen USB ports; focus on functionality. RAM (Random Access Memory) is another area where you can be smart. While 32GB is becoming standard for high-end builds, 16GB of DDR4 RAM running at 3200MHz or 3600MHz is perfectly adequate for most budget gaming scenarios. Speed matters more than raw capacity up to a certain point for gaming performance. Keep an eye out for sales and bundles where RAM might be discounted.
Storage is where you can see significant cost savings. An NVMe SSD (Solid State Drive) is a must-have for your operating system and frequently played games due to its blazing-fast speeds. However, you don't need a massive 2TB NVMe drive immediately. A 500GB or 1TB NVMe for your OS and primary games, supplemented by a larger, cheaper SATA SSD or even a traditional HDD (Hard Disk Drive) for less demanding games and general storage, is a common and effective budget strategy. Power supply units (PSUs) are often overlooked but are crucial. Don't skimp here. A reliable 80 Plus Bronze or Gold rated PSU from a reputable brand (like Corsair, Seasonic, EVGA) with sufficient wattage for your components (typically 550W-750W for most budget builds) will ensure stability and longevity. Finally, the PC case. This is largely aesthetic, but ensure it has good airflow and enough space for your chosen components. You can find many affordable cases that offer excellent value and functionality without the premium price tag. Remember, the goal is to find the sweet spot where performance meets affordability, making informed decisions on each part. For more general
gaming PC tips, explore our other guides.
Smart Strategies for Cost-Effective Component Sourcing
 Photo: Official Glacier / Pexels
Once you have a clear understanding of the components you need, the next critical step in building a budget gaming PC is mastering the art of sourcing those parts cost-effectively. This isn't just about waiting for Black Friday sales; it involves a multi-faceted approach to finding the best deals year-round. One of the most impactful strategies is exploring the used market. Websites like eBay, Craigslist, Facebook Marketplace, and dedicated subreddits (e.g., r/hardwareswap) are treasure troves for gently used components. CPUs, RAM, and even motherboards often retain excellent performance for years and can be purchased at a significant discount compared to new prices. GPUs, while carrying a bit more risk due to potential mining use, can also offer incredible value if you buy from a reputable seller and can test the card upon arrival. Always ask for benchmarks, original packaging, and photos, and check seller ratings meticulously.
Refurbished components are another excellent avenue. Many retailers and manufacturers offer refurbished parts that have been tested and certified to work like new, often coming with a limited warranty. This provides a middle ground between new and used, offering peace of mind along with cost savings. Keep an eye on sales events throughout the year, not just major holidays. Mid-season sales, back-to-school promotions, and even individual retailer flash sales can yield significant discounts on new components. Price tracking websites and browser extensions can be invaluable tools here, alerting you when a desired component drops to a target price. Don't be afraid to mix and match; you don't have to buy everything from a single retailer. Compare prices across multiple vendors like Amazon, Newegg, Best Buy, and Micro Center (if you're lucky enough to have one nearby). Micro Center, in particular, often has fantastic in-store CPU/motherboard bundles that can slash hundreds off your build cost.
Another clever trick is to consider previous-generation components. When new CPU or GPU architectures are released, the prices of the older generation often drop significantly. These older parts still offer excellent performance and can be the backbone of a very capable budget gaming PC. For example, an AMD Ryzen 5 3600 or an Intel Core i5-10400F, while not the latest, can still drive most games beautifully when paired with a suitable GPU. The same applies to RAM; while DDR5 is newer, DDR4 is still widely available, cheaper, and more than sufficient for budget gaming. Finally, be flexible with brands. While some brands have strong loyalty, often a competitor offers a very similar product at a lower price. Research benchmarks and user reviews to ensure you're not sacrificing too much performance or reliability for a cheaper alternative. Patience is also a virtue in budget building; sometimes, waiting a few extra weeks for the right deal can save you a substantial amount of money.
Assembling Your Budget Gaming Powerhouse
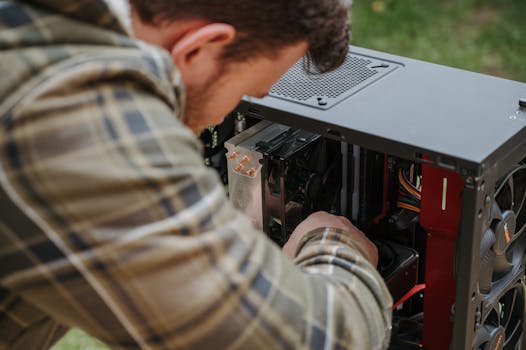 Photo: Anete Lusina / Pexels
With all your carefully sourced components in hand, the exciting phase of assembly begins. Building your own PC might seem intimidating, but it's essentially a high-tech LEGO set, and with a methodical approach, anyone can do it. Before you even open a box, find a clean, well-lit workspace, preferably on a non-conductive surface like a wooden table. Gather your tools: a Phillips head screwdriver (magnetic tip is a bonus), zip ties or Velcro straps for cable management, and perhaps a headlamp for better visibility inside the case. Crucially, practice static discharge by touching a grounded metal object (like your PC case's bare metal) frequently, or wear an anti-static wrist strap, to protect sensitive components from electrostatic discharge.
Start with the motherboard. Install the CPU into its socket, ensuring the triangle or arrow on the CPU aligns with the corresponding mark on the socket. Gently lower the retention arm. Next, install the CPU cooler. If it's an aftermarket cooler, follow its specific instructions; if it's the stock cooler, apply thermal paste (if not pre-applied) and secure it. Then, install the RAM modules into the designated slots (typically slots 2 and 4 for dual-channel performance), pressing firmly until they click into place. At this point, you can install the NVMe SSD directly onto the motherboard, usually beneath a heatsink, and secure it with a small screw. These initial steps are often easiest to perform with the motherboard outside the PC case.
Now, prepare your PC case. Install the I/O shield (if not integrated) into the back of the case. Mount the motherboard carefully, aligning the screw holes and securing it with standoffs and screws. Next, install the power supply unit (PSU) into its designated bay, usually at the bottom or top of the case, and secure it with screws. Begin routing the main power cables from the PSU (24-pin ATX, 8-pin CPU power) to their respective connectors on the motherboard, trying to route them behind the motherboard tray for cleaner cable management. Install your graphics card (GPU) into the top PCIe x16 slot on the motherboard. Press it firmly until it clicks, then secure it with a screw or latch. Connect any necessary PCIe power cables from the PSU to the GPU. Finally, connect the front panel connectors (power switch, reset switch, USB ports, audio jacks) to their tiny, often fiddly, headers on the motherboard. Refer to your motherboard manual for the exact pin layout. Install any additional storage drives (SATA SSDs or HDDs) into their bays and connect data and power cables. Take your time with cable management; neat cables not only look better but also improve airflow. Once everything is connected, double-check all connections, close up your case, and prepare for the initial boot. For more detailed visual guidance, searching for '
PC build guide video' on YouTube can be incredibly helpful.
Optimizing Performance: Post-Build Essentials & Common Mistakes to Avoid
 Photo: Matheus Bertelli / Pexels
Even after successfully assembling your budget gaming PC, the journey isn't over. Several crucial post-build steps are essential to ensure you're getting the best possible performance and stability from your new rig. The first and most critical step is installing your operating system. Windows 10 or 11 are standard for gaming. You can create a bootable USB drive using Microsoft's Media Creation Tool and install it from there. Remember, you don't need to buy a full-price Windows license immediately; you can often run Windows unactivated for a period, though with some limitations, while you save up for a key.
Once Windows is installed, the next priority is installing all necessary drivers. Start with your motherboard chipset drivers, which are usually found on the motherboard manufacturer's website. Then, install the latest graphics card drivers directly from AMD or NVIDIA's websites. Do not rely solely on Windows Update for these; dedicated drivers provide optimal performance and features. Install drivers for any other peripherals like Wi-Fi adapters or sound cards. Update your BIOS/UEFI firmware if an update is available and addresses performance or stability issues – but be cautious and follow the manufacturer's instructions precisely, as a failed BIOS update can brick your motherboard.
Now, for optimization. Enable XMP (Extreme Memory Profile) or DOCP (Direct Overclock Profile) in your BIOS to ensure your RAM runs at its advertised speed. By default, RAM often runs at a lower base speed, leaving performance on the table. Adjusting fan curves in your BIOS or using software like FanControl can help maintain optimal temperatures without excessive noise. Overclocking your CPU or GPU can yield extra performance, but for a budget build, it's generally recommended to focus on stable stock performance first. If you choose to overclock, proceed cautiously and research specific guides for your components.
Common Mistakes to Avoid:
* **Skimping on the PSU:** A cheap, unreliable power supply can damage components or lead to instability. Always invest in a reputable brand with an 80 Plus rating.
* **Poor Cable Management:** While aesthetic, good cable management improves airflow, which is crucial for component longevity and performance, especially in compact budget cases.
* **Forgetting Drivers:** Running on generic Windows drivers significantly hinders performance. Always install the latest, dedicated drivers for all your components.
* **Ignoring Cooling:** Even budget components can get hot. Ensure your case has adequate airflow and consider adding an extra case fan if temperatures are high.
* **Impatience:** Rushing the build or troubleshooting process can lead to mistakes. Take your time, read manuals, and don't hesitate to consult online resources when stuck.
* **Unrealistic Expectations:** A budget PC will perform well for its price point, but don't expect it to rival high-end rigs on ultra settings at 4K. Manage your expectations based on your component choices.
By following these post-build essentials and avoiding common pitfalls, you'll ensure your budget gaming PC delivers a smooth, enjoyable, and stable gaming experience for years to come.
