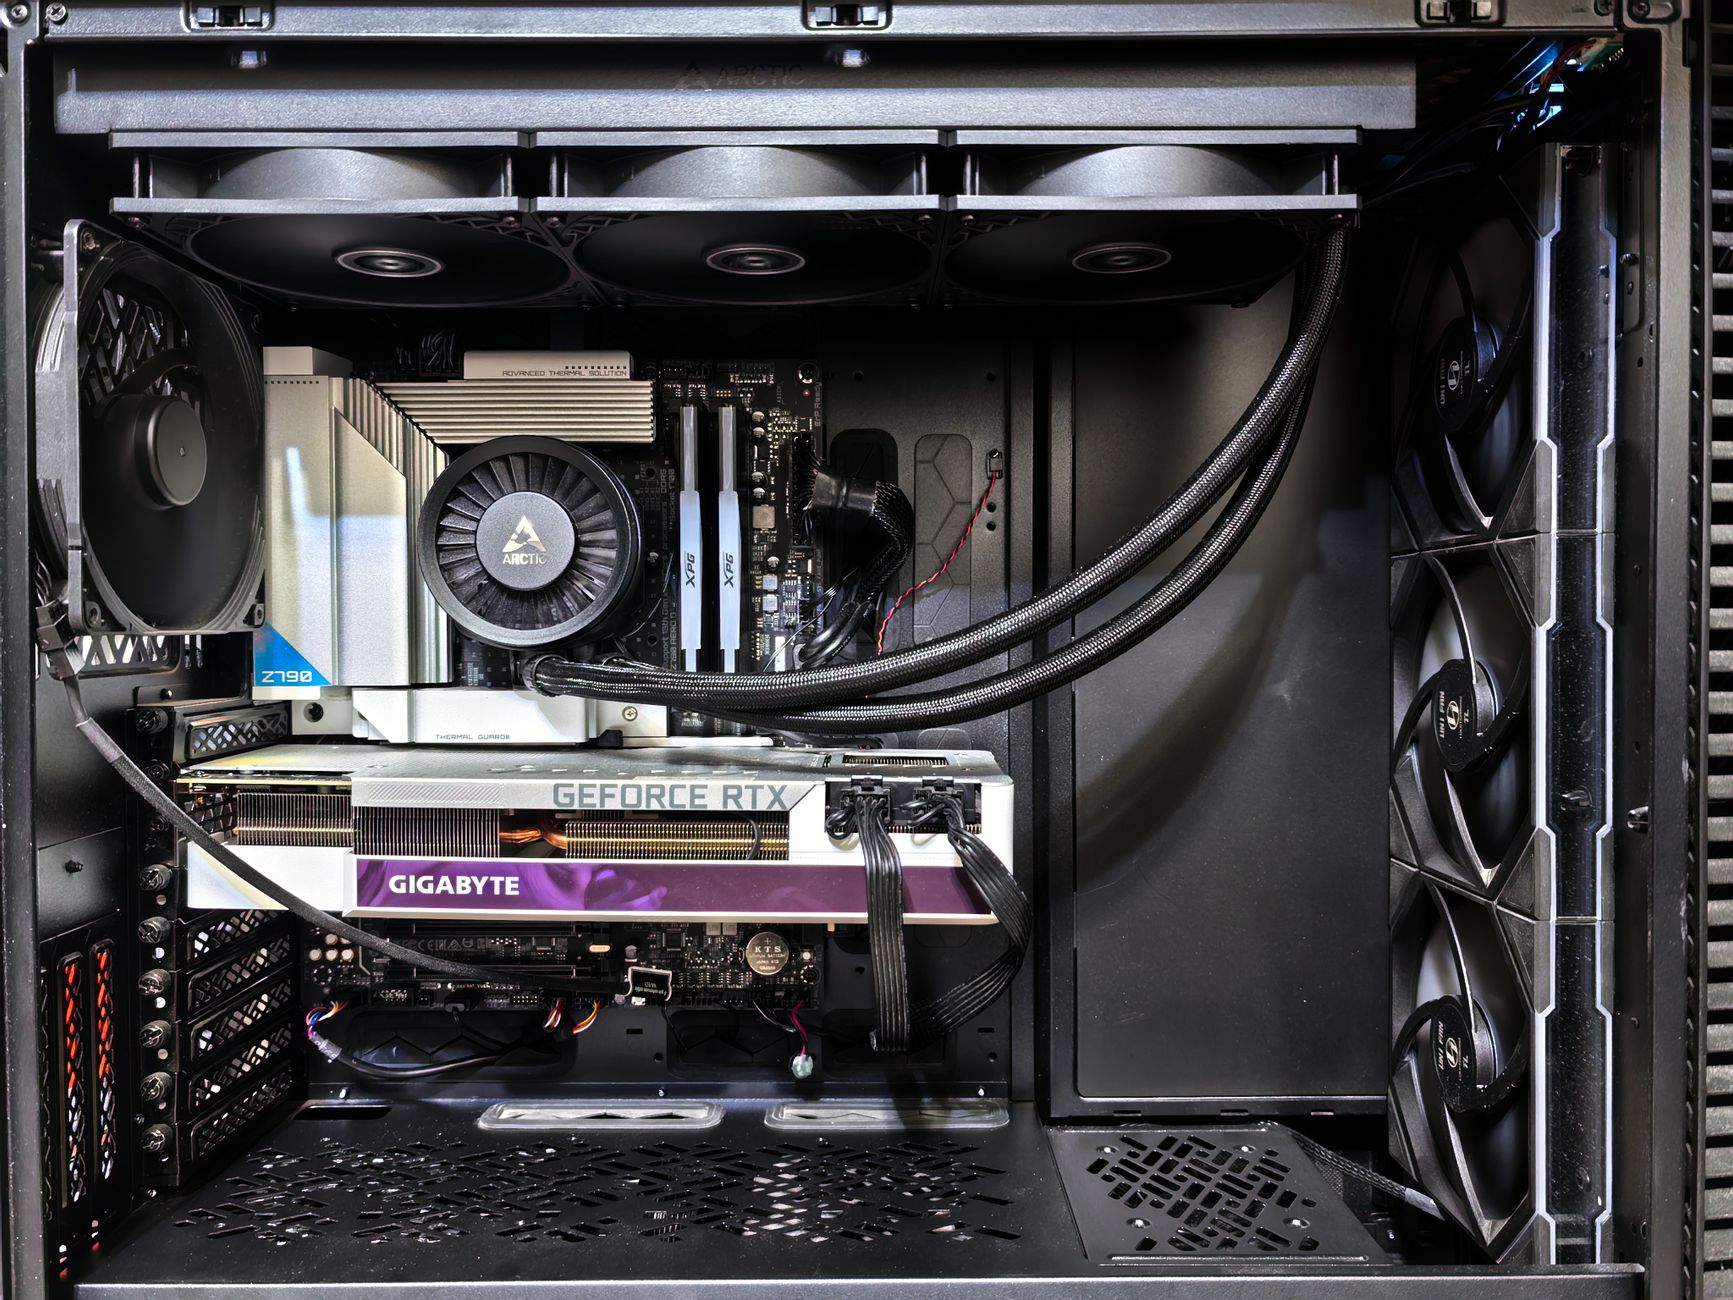
How to Build a Gaming PC for Beginners: Your Ultimate Guide
July 15, 2026 16 min read 3,274 words
Assemble your dream gaming rig with confidence, even if you've never touched a screwdriver before.
Start Building Now
Understanding Core Gaming PC Components
Embarking on the journey of how to build a gaming PC for beginners might seem daunting, but it all starts with understanding the fundamental components that make up your machine. Think of these as the vital organs of your gaming beast, each playing a crucial role in its overall performance. The better you understand them, the more informed your choices will be, and the more satisfying your build will become. Let's break down the essentials: the CPU, GPU, Motherboard, RAM, Storage, Power Supply Unit (PSU), and Case.
First up, the Central Processing Unit (CPU), often called the 'brain' of your computer. For gaming, a powerful CPU is essential for handling game logic, AI, and background processes. Brands like Intel (Core i5, i7, i9) and AMD (Ryzen 5, 7, 9) dominate this space. You'll want to balance core count and clock speed with your budget. A higher core count is beneficial for multitasking and future-proofing, while higher clock speeds contribute directly to in-game performance. Don't skimp here, but don't overspend if your GPU won't keep up. Next, and arguably the most critical component for gaming, is the Graphics Processing Unit (GPU), or graphics card. This is what renders all the beautiful visuals you see on your screen. NVIDIA (GeForce RTX/GTX) and AMD (Radeon RX) are the primary manufacturers. Your GPU choice will largely dictate the resolution and frame rates you can achieve in games. For beginners, a mid-range card often offers the best bang for your buck, allowing for smooth 1080p or even 1440p gaming without breaking the bank. Researching benchmarks for specific games you want to play is highly recommended when choosing a GPU. You can find excellent resources on
gaming hardware reviews to help with this decision.
Then we have the Motherboard, the 'nervous system' that connects all your components. It dictates what CPU you can use (socket type), how much RAM it can hold, and what storage options are available. Compatibility is key here. Ensure your chosen motherboard supports your CPU generation and has enough slots for your RAM and M.2 SSDs. Don't feel the need to buy the most expensive one; a mid-range board from reputable brands like ASUS, MSI, or Gigabyte will serve most beginners well. Random Access Memory (RAM) acts as your computer's short-term memory, storing data that the CPU needs to access quickly. For gaming, 16GB is generally the sweet spot, providing ample memory for most modern titles and multitasking. While 32GB offers more headroom, it's often not a priority for a beginner's budget unless you plan on heavy video editing or streaming. Speed (measured in MHz) and latency (CAS Latency) are important, with higher speeds generally equating to better performance.
Storage is where your operating system, games, and files reside. Solid State Drives (SSDs) are the standard for gaming PCs due to their incredible speed compared to traditional Hard Disk Drives (HDDs). An NVMe M.2 SSD is the fastest option and ideal for your operating system and frequently played games. A 1TB NVMe drive is a good starting point, with additional SATA SSDs or HDDs for mass storage if needed. The Power Supply Unit (PSU) provides electricity to all your components. It's crucial to choose a PSU with sufficient wattage for your system and a good efficiency rating (e.g., 80 Plus Bronze, Gold). Never cut corners on the PSU; a cheap, unreliable unit can damage other components. Use online PSU calculators to estimate your required wattage. Finally, the PC Case houses all your components. Beyond aesthetics, consider airflow, size (ATX, Micro-ATX, Mini-ITX), and ease of cable management. A good case will make the building process smoother and help keep your components cool. Remember, each component works in synergy, so aim for a balanced build rather than overspending on one part while neglecting others.
Planning Your Budget and Component Selection
Before you even think about putting screwdriver to screw, the most crucial step in how to build a gaming PC for beginners is meticulous planning, especially when it comes to your budget and component selection. This phase is where you define your gaming goals and match them with what your wallet allows. A well-planned budget prevents overspending on unnecessary features and ensures you get the best performance for your money. Start by setting a realistic total budget. Are you aiming for a high-end 4K monster, a solid 1440p performer, or an entry-level 1080p machine? Your budget will dictate these capabilities.
Once you have a total figure, allocate percentages to each major component. A common distribution for a balanced gaming PC might look something like this: 30-40% for the GPU, 15-20% for the CPU, 10-15% for the Motherboard, 5-10% for RAM, 5-10% for Storage, 5-10% for the PSU, and 5-10% for the Case. These are rough guidelines, and you might adjust them based on specific deals or particular performance priorities. For instance, if you're building a PC primarily for CPU-intensive strategy games, you might shift a bit more budget towards the CPU. Conversely, for graphically demanding AAA titles, the GPU takes precedence.
Component compatibility is paramount. Tools like PCPartPicker.com are invaluable for beginners. This website allows you to select components, and it automatically checks for compatibility issues between your chosen CPU and motherboard (socket type, chipset), RAM (DDR4 vs. DDR5, speed limits), and even power supply wattage requirements. It also helps you track prices and find deals. Don't underestimate the importance of research. Read reviews, watch YouTube build guides, and compare benchmarks for the specific games you want to play. For example, if you want to play Cyberpunk 2077 at 1440p with high settings, look up benchmarks for different GPUs in that game to see what kind of performance you can expect. This level of detail will prevent buyer's remorse and ensure your build meets your expectations.
Consider future upgrades when selecting components. While you might be building a budget-friendly PC now, choosing a motherboard with extra RAM slots or an M.2 slot can make upgrading easier down the line. Similarly, a slightly higher wattage PSU than immediately necessary can accommodate a more powerful GPU in the future. Don't forget about peripherals! Your budget should also account for a monitor, keyboard, mouse, and operating system (Windows is standard for gaming). These can add a significant amount to your total cost, so factor them in from the start. Planning effectively in this stage will save you headaches and potential re-purchases later, making the actual assembly process much smoother and more enjoyable.
Step-by-Step Assembly: Bringing Your Gaming Rig to Life
Now for the exciting part of how to build a gaming PC for beginners: the actual assembly! While it might seem like a complex jigsaw puzzle, approaching it step-by-step makes it manageable and enjoyable. Before you begin, gather all your components, tools (Phillips head screwdriver, zip ties, anti-static wrist strap, and possibly a headlamp), and clear a well-lit, spacious workspace. Make sure your hands are clean and dry. Static electricity is the enemy of electronics, so wear your anti-static wrist strap and attach it to an unpainted metal part of your PC case.
Start with the Motherboard. This is the foundation upon which everything else sits. First, install your Central Processing Unit (CPU). Carefully open the CPU socket lever on your motherboard, align the gold triangle on the CPU with the corresponding triangle on the socket, and gently drop the CPU into place. Do not force it. Once seated, close the lever to secure it. Next, install the CPU Cooler. If it's an air cooler, apply thermal paste (if not pre-applied) and mount the heatsink and fan according to its instructions. If it's an all-in-one (AIO) liquid cooler, you'll install the CPU block now and mount the radiator later in the case. After the CPU and cooler, install your RAM (Random Access Memory). Open the clips on the RAM slots, align the RAM sticks with the notch in the slot, and press down firmly until the clips snap into place. Most motherboards have specific slots for dual-channel memory; consult your motherboard manual for the correct configuration. Finally, install your M.2 SSD(s) directly onto the motherboard. Locate the M.2 slot(s), remove the tiny screw, insert the SSD at an angle, and then push it down and secure it with the screw. This pre-assembly outside the case is much easier than trying to maneuver in tight spaces later.
With the core components mounted, it's time to install the Motherboard into the PC Case. Install the I/O shield (if not pre-attached to the motherboard) into the case opening. Carefully lower the motherboard into the case, aligning the screw holes with the standoffs already in the case. Secure the motherboard with screws, but don't overtighten. Next, install your Graphics Processing Unit (GPU). Open the PCIe retention clip on the motherboard, align the GPU with the slot, and push it firmly into place until the clip snaps shut. Secure the GPU to the case with screws. If you have any additional storage drives (SATA SSDs or HDDs), install them into their designated bays in the case now. Then, install the Power Supply Unit (PSU) into its bay, typically at the bottom of the case. Secure it with screws and begin connecting the necessary power cables to the motherboard (24-pin ATX, 8-pin CPU), GPU (PCIe power), and storage drives (SATA power). This is also a good time to connect the case's front panel connectors (power switch, reset switch, USB, audio) to the motherboard. These are often tiny and can be fiddly, so refer to your motherboard manual for their exact locations. Cable management is crucial for airflow and aesthetics. Use zip ties or Velcro straps to bundle and route cables neatly behind the motherboard tray. Take your time with this step, as good cable management can make a big difference in the internal appearance and cooling efficiency of your PC. Once all connections are made and cables are managed, close up your case. Before powering on, double-check all connections. Connect your monitor, keyboard, and mouse. Power on your PC, and if all goes well, you should see your BIOS/UEFI screen. From there, you'll install your operating system (usually Windows) from a USB drive and then install all the necessary drivers for your components, especially your GPU. Congratulations, you've just learned
how to build a gaming PC!
Troubleshooting Common Issues and Essential Tips for Beginners
Even with the most careful planning, beginners building a gaming PC might encounter a few hiccups. Don't get discouraged; troubleshooting is a normal part of the process! Here are some common issues and essential tips to help you navigate your first build.
**Common Troubleshooting Scenarios:**
* **PC Won't Turn On (No Power):**
* Check if the power supply switch is flipped to 'on' (usually 'I' not 'O').
* Ensure the 24-pin ATX and 8-pin CPU power cables are fully seated in the motherboard and PSU.
* Verify your case's front panel power switch connector is correctly plugged into the motherboard.
* Test your wall outlet or surge protector.
* **PC Turns On, No Display:**
* Make sure your monitor is plugged into the Graphics Card, not the motherboard's integrated graphics ports.
* Reseat your RAM sticks. Sometimes they don't click in perfectly.
* Reseat your GPU. Ensure it's fully seated in the PCIe slot and secured.
* Check all power cables to the GPU.
* **PC Turns On, Shuts Off Immediately:**
* This often indicates a CPU overheating issue or a short circuit. Double-check your CPU cooler installation; ensure thermal paste is applied and the cooler is making good contact.
* Inspect for any metal components touching the motherboard where they shouldn't (e.g., missing standoffs).
* **Windows Won't Install/Boot:**
* Ensure your boot drive (USB with Windows installer) is properly created and set as the first boot option in BIOS/UEFI.
* Check if your SSD is detected in the BIOS.
**Essential Tips for Beginners:**
* **Read the Manuals:** Seriously, every component comes with a manual. They are your best friends, especially the motherboard manual, which details every header and port.
* **Watch Build Guides:** Before you start, watch several full build guides on YouTube. Seeing the process visually can clear up many uncertainties.
* **Anti-Static Precautions:** Always use an anti-static wrist strap or at least frequently touch a grounded metal object (like your PC case) to discharge static electricity. This protects sensitive components.
* **Take Your Time:** Don't rush. Building a PC is not a race. If you feel overwhelmed, take a break.
* **Organize Your Screws:** Use small containers or a magnetic mat to keep different types of screws organized. Motherboard screws, case screws, and M.2 screws often look similar but are different.
* **Cable Management:** Plan your cable routes as you build. Good cable management improves airflow and makes future upgrades or troubleshooting easier.
* **Test Before Fully Closing:** After you've installed the core components (CPU, cooler, RAM, GPU), do a quick 'outside-the-case' test before putting everything into the case. This makes troubleshooting easier if something isn't working.
* **Install Drivers:** After installing Windows, immediately install your motherboard chipset drivers and, most importantly, your GPU drivers. Without proper GPU drivers, your gaming performance will be severely limited.
* **Don't Force Anything:** If a component isn't going in easily, stop and re-evaluate. Most PC parts are designed to fit with minimal force. Forcing can bend pins or damage components.
* **Ask for Help:** If you're stuck, don't hesitate to consult online forums, Reddit communities (like r/buildapc), or friends who have experience. The PC building community is generally very helpful.
By following these tips and being prepared for common issues, you'll significantly increase your chances of a successful and enjoyable first build. Remember, learning how to build a gaming PC for beginners is a rewarding experience that empowers you with knowledge and a custom machine tailored to your needs.