✓ Regular cleaning prevents overheating and performance degradation.
✓ Dust is the primary enemy of PC components, causing thermal issues.
✓ Proper tools are crucial to avoid damaging sensitive electronics.
✓ Thermal paste replacement is vital for CPU cooling efficiency.
How It Works
1
Gather Your Tools & Prep
Before you begin, ensure you have all necessary cleaning supplies. Disconnect your PC from power and move it to a well-ventilated, static-free area.
2
Initial Dust Removal
Open your PC case and use compressed air to blow out loose dust from fans, heatsinks, and interior surfaces. Hold fans to prevent over-spinning.
3
Component-Specific Cleaning
Carefully remove individual components like the GPU, RAM, and CPU cooler for more thorough cleaning. Use isopropyl alcohol for stubborn grime on non-conductive surfaces.
4
Reassembly & Testing
Once all components are clean and dry, reassemble your PC, ensuring all connections are secure. Power it on and monitor temperatures to confirm proper function.
Why Regular Gaming PC Maintenance is Crucial for Performance
Photo: Tima Miroshnichenko / Pexels
In the demanding world of PC gaming, every frame per second and every degree of temperature can make a significant difference to your experience. Your high-performance gaming rig, while a marvel of engineering, is constantly battling an unseen enemy: dust. This seemingly innocuous particulate matter can accumulate rapidly within your PC case, acting as an insulator and trapping heat. The consequences of neglected maintenance are far-reaching, impacting not only your system's performance but also its longevity.
Overheating is perhaps the most immediate and noticeable effect of a dusty PC. Components like your CPU and GPU generate substantial heat during intense gaming sessions. Modern CPUs and GPUs are designed with thermal throttling mechanisms, which automatically reduce clock speeds to prevent damage when temperatures rise too high. This means that a PC struggling with dust-induced heat will experience significant performance drops, leading to stuttering, lower frame rates, and an overall less enjoyable gaming experience. Imagine trying to land a critical headshot in your favorite FPS, only for your game to suddenly slow down due to thermal throttling – it's incredibly frustrating and entirely preventable. Beyond just performance, prolonged exposure to high temperatures can irreversibly shorten the lifespan of your valuable components. Capacitors can degrade faster, solder joints can weaken, and silicon chips can suffer microscopic damage over time, eventually leading to component failure.
Moreover, dust isn't just an insulator; it can also be mildly conductive, especially when combined with humidity. While rare, a thick layer of dust can potentially bridge electrical contacts, leading to short circuits and catastrophic damage. Even without a short, dust can impede airflow, making fans work harder and louder, consuming more power, and accelerating wear and tear on mechanical parts. The cumulative effect of these issues means that a PC left uncleaned is a PC slowly committing self-sabotage. Regular cleaning isn't just about aesthetics; it's a fundamental aspect of proactive system health, ensuring your investment continues to deliver peak performance for years to come. Understanding the 'why' behind cleaning your gaming PC components is the first step towards adopting a beneficial routine that will pay dividends in stability, speed, and silence. It's about protecting your investment and ensuring you always get the best out of your gaming experience. For more tips on optimizing your gaming setup, check out our guide on optimizing gaming settings.
Essential Tools and Safety Precautions for Cleaning Your PC
Photo: Athena Sandrini / Pexels
Before you dive into the intricate world of PC cleaning, arming yourself with the right tools and understanding crucial safety protocols is paramount. Improper tools or a cavalier approach can lead to irreparable damage to sensitive electronics. Think of it as performing delicate surgery; precision and care are key. The primary enemy during PC cleaning, besides dust itself, is static electricity. A static discharge, even one you can't feel, can fry delicate components like RAM modules or your motherboard. Therefore, an anti-static wrist strap is not just recommended, but practically mandatory. Clip it to an unpainted metal part of your PC case or another grounded object to equalize your electrical potential with the system.
Your cleaning arsenal should include several key items. First and foremost, compressed air (or an electric air duster) is your best friend for dislodging loose dust. When using compressed air cans, ensure you hold them upright to prevent propellant from spraying onto components, which can leave residue or cause extreme cold damage. Electric air dusters are a more environmentally friendly and cost-effective long-term solution. Next, you'll need a set of small, soft-bristled brushes. Makeup brushes, paintbrushes (never used for paint), or dedicated electronics cleaning brushes are excellent for gently dislodging dust from heatsink fins, fan blades, and intricate crevices without scratching. For more stubborn grime, especially on non-conductive surfaces like fan blades or case interiors, a microfiber cloth lightly dampened with isopropyl alcohol (90% or higher purity) is ideal. Avoid using water or standard household cleaners, as they can leave conductive residues or cause corrosion.
Cotton swabs, also dampened with isopropyl alcohol, are perfect for cleaning hard-to-reach spots, especially around ports or small heatsinks. For thermal paste replacement, you'll need fresh thermal paste and a lint-free cloth or paper towel along with isopropyl alcohol to clean off the old paste. Finally, a small set of Phillips head screwdrivers will be indispensable for opening your case and potentially removing components like your GPU or CPU cooler. Always work in a well-lit, clean, and well-ventilated area. Avoid carpeting, which generates static. Before touching anything inside your PC, always disconnect it from the wall outlet and press the power button a few times to discharge any residual power in the capacitors. Patience and a methodical approach will ensure a safe and effective cleaning process, safeguarding your valuable hardware.
Step-by-Step Guide to Cleaning Each Major PC Component
Photo: Athena Sandrini / Pexels
Once you've gathered your tools and prepared your workspace, it's time to systematically clean each major component of your gaming PC. This methodical approach ensures no dust bunny is left behind and minimizes the risk of damage. Always remember to discharge static with your anti-static wrist strap before beginning. Begin by removing the side panel(s) of your PC case. For optimal access, lay the case on its side on a stable, flat surface. Take a moment to visually inspect the interior, noting areas of heavy dust accumulation.
**Case and Fans:** Start with the easiest – the case itself and its mounted fans. Use compressed air to blow dust out of the case vents, fan grilles, and any mesh filters. For the fans, hold the blades gently with your finger to prevent them from spinning rapidly (which can damage bearings or generate power back into the motherboard). Blow air through the fan blades and then use a soft brush or cotton swab with isopropyl alcohol to meticulously clean each blade. Don't forget to clean any removable dust filters thoroughly with water and mild soap if they're plastic, ensuring they are completely dry before reinstallation, or simply brush/blow out fabric filters.
**Graphics Card (GPU):** This is often the dustiest component due to its large heatsink and fans. Carefully unscrew the GPU from its PCIe slot bracket and disconnect the power cables. Gently unclip it from the PCIe slot and remove it. Take it to a well-ventilated area. Use compressed air to blow dust out of the heatsink fins and off the fan blades. Again, hold the fans to prevent spinning. For stubborn grime, a soft brush and isopropyl alcohol can be used on the fan blades and shroud. Do NOT attempt to disassemble the GPU heatsink unless you are experienced, as this often voids warranties and is complex. Re-seat it firmly, ensuring the clip engages and power cables are reconnected.
**CPU Cooler:** This can be either an air cooler or an AIO liquid cooler. For air coolers, you'll typically need to unmount the fan(s) from the heatsink. Use compressed air and a brush to clean the heatsink fins thoroughly. For the fan(s), clean them as you would case fans. If you're replacing thermal paste (recommended every 2-3 years or if temperatures are high), you'll need to completely remove the CPU cooler from the CPU. Gently twist the cooler slightly before lifting to break the thermal paste seal. Use a lint-free cloth and isopropyl alcohol to carefully wipe off all old thermal paste from both the CPU's integrated heat spreader (IHS) and the cooler's cold plate. Apply a new pea-sized dot or line of fresh thermal paste to the center of the CPU before reinstalling the cooler, following the manufacturer's instructions for mounting pressure. Learn more about optimizing CPU performance.
**RAM Modules:** RAM sticks usually don't accumulate much dust on their contacts, but dust can settle on the heat spreaders. Gently remove the RAM sticks by pressing down on the retention clips on either side of the slots. Use compressed air to clear the RAM slots on the motherboard. For the RAM modules themselves, a light pass with compressed air is usually sufficient. Avoid touching the gold contacts with your bare hands.
**Motherboard and Other Components:** For the motherboard, use compressed air to clear dust from all crevices, chipsets, and smaller heatsinks. A soft brush can help dislodge dust from around ports and smaller components. Be extremely gentle. For the Power Supply Unit (PSU), if it has an exposed fan on the bottom of the case, clean that fan externally with compressed air. Do NOT open the PSU casing, as it contains high-voltage capacitors that can deliver a dangerous shock even when unplugged. If your PSU is excessively dusty inside, it's safer to replace it or have it professionally cleaned. Finally, give any hard drives or SSDs a quick wipe with a microfiber cloth if needed. Once all components are clean, reassemble your PC carefully, ensuring all cables are routed properly and components are securely seated. Power on and monitor for any unusual noises or high temperatures.
Advanced Tips and Common Mistakes to Avoid When Cleaning Your Gaming PC
Photo: Matheus Bertelli / Pexels
Beyond the basic steps, a few advanced tips can elevate your PC cleaning game, ensuring maximum efficiency and component protection. Conversely, being aware of common pitfalls can save you a lot of headache and potential hardware damage. One advanced tip is to consider an electric air duster. While compressed air cans are convenient, they can run out quickly, are costly over time, and can sometimes spray propellant if held incorrectly. An electric duster provides a continuous, powerful stream of air without the risk of propellant discharge, making it a worthwhile investment for frequent cleaners. Another pro-tip involves cable management: while not strictly a cleaning step, tidying up your internal cables improves airflow significantly, which in turn reduces dust accumulation and helps maintain lower temperatures, making future cleanings easier and less frequent. Use zip ties or Velcro straps to bundle cables neatly behind the motherboard tray or along the case edges.
For those with custom water-cooling loops, maintenance extends beyond just dust. Regularly inspecting your coolant for discoloration or particulate matter, and flushing/refilling your loop every 6-12 months, is crucial to prevent blockages and maintain optimal cooling performance. This is a more advanced task that requires specific knowledge and tools. Additionally, periodically checking the thermal pads on your GPU memory and VRMs (Voltage Regulator Modules) is a good practice. While less frequent than thermal paste replacement, these pads can degrade over time, impacting cooling. Replacing them with high-quality alternatives can sometimes yield surprising temperature improvements.
Now, let's talk about common mistakes to avoid. The absolute cardinal sin is using a vacuum cleaner inside your PC. Vacuum cleaners generate immense static electricity, which, as discussed, can instantly destroy components. Their nozzles can also scratch motherboards and dislodge small surface-mounted components. Another frequent error is using incorrect cleaning agents. Never use water, glass cleaner, or general household sprays, as they often contain conductive chemicals or leave corrosive residues. Always stick to high-purity isopropyl alcohol (90% or higher) for electronic components. Over-spinning fans with compressed air is another pitfall; this can damage fan bearings and, in rare cases, generate a small electrical current back into the motherboard. Always hold fan blades stationary when blowing air through them. Finally, rushing the process or failing to disconnect power completely are recipes for disaster. Take your time, be methodical, and always ensure your PC is unplugged from the wall. A little patience goes a long way in preserving your expensive gaming hardware and ensuring it runs at its peak.
Comparison
Feature
Electric Air Duster
Compressed Air Can
Vacuum Cleaner (NOT RECOMMENDED)
Cost (Initial)
Higher
Lower
Varies
Cost (Long-term)
Very Low
High
N/A (already owned)
Environmental Impact
Low
High (disposable cans)
Low
Static Electricity Risk
Low
Low
Very High
Propellant Risk
None
Yes
None
Effectiveness
Excellent
Good
Terrible (for PC internals)
Recommended for PC Cleaning
✓
✓
✗
What Readers Say
★★★★★
"Following this guide on how to clean gaming PC components was a game-changer. My CPU temperatures dropped by 10 degrees Celsius, and my PC runs so much quieter now. The step-by-step instructions were incredibly clear, even for a beginner."
Alex R. · Austin, TX
★★★★★
"I used to be intimidated by cleaning my PC, but this article broke it down perfectly. The tips on anti-static safety and specific component cleaning were invaluable. My frame rates in demanding games have definitely improved!"
Sarah J. · Miami, FL
★★★★★
"After reading this guide, I finally tackled the dust monster inside my rig. My GPU fan used to ramp up constantly, but after cleaning following these steps, it's significantly quieter, and my overall system feels snappier. Highly recommend this comprehensive approach."
Michael T. · Seattle, WA
★★★★★
"The guide was mostly excellent, especially the safety precautions. I wish there was a bit more detail on cleaning custom water loops, but for general air-cooled systems, it's incredibly thorough and helpful. My PC definitely needed this deep clean."
Emily P. · Denver, CO
★★★★★
"As a casual gamer, I never thought much about cleaning until my PC started lagging. This article taught me how to clean gaming PC components properly, and the difference is night and day. It's like having a brand new computer again, without the expense."
David L. · Chicago, IL
Frequently Asked Questions
How often should I clean my gaming PC components?
The frequency depends on your environment. If you live in a dusty area, have pets, or smoke, monthly or bi-monthly light cleaning is advisable. For most users, a thorough deep clean every 3-6 months is sufficient to prevent significant dust buildup and maintain optimal performance.
Is it safe to use a regular vacuum cleaner to clean my PC?
Absolutely not. Using a regular vacuum cleaner is one of the most common and dangerous mistakes. Vacuum cleaners generate significant static electricity, which can easily damage sensitive electronic components. Always use compressed air or an electric air duster.
What kind of alcohol should I use for cleaning PC components?
You should only use high-purity isopropyl alcohol (IPA) with a concentration of 90% or higher. Lower concentrations contain more water, which can leave residue or cause corrosion. IPA evaporates quickly and leaves no residue, making it ideal for electronics.
Do I need to replace thermal paste every time I clean my CPU cooler?
Not necessarily every time you dust, but it is highly recommended if you completely remove the CPU cooler from the CPU. Thermal paste degrades over time, and breaking the seal between the CPU and cooler often compromises its effectiveness. Replacing it ensures optimal heat transfer.
What's the difference between compressed air cans and an electric air duster?
Compressed air cans are portable and convenient but can be costly, run out quickly, and may spray propellant if not held upright. Electric air dusters are a one-time investment, offer continuous powerful airflow, are more environmentally friendly, and don't have propellant risks, making them superior for regular use.
Who should perform a deep clean of their gaming PC?
Anyone experiencing higher-than-normal temperatures, decreased performance (e.g., lower frame rates, stuttering), or excessive fan noise should perform a deep clean. It's also a crucial preventative measure for all PC owners to extend hardware lifespan and maintain peak efficiency.
What are the risks of not cleaning my gaming PC components?
The primary risks include overheating, which leads to thermal throttling (reduced performance), increased fan noise, and ultimately, a shortened lifespan for components like your CPU and GPU. In extreme cases, dust can also contribute to electrical shorts.
Will cleaning my PC affect my warranty?
Generally, opening your PC case to clean it does not void the warranty, especially if you're not physically damaging components. However, disassembling specific components like your GPU heatsink or tampering with specific manufacturer seals might. Always check your component's warranty policy if unsure.
By consistently applying the techniques for how to clean gaming PC components outlined in this guide, you're not just dusting; you're actively preserving your investment, enhancing performance, and extending the life of your valuable gaming rig. Don't let dust diminish your experience – take control and enjoy a cleaner, cooler, and faster gaming PC today.

 Photo: Tima Miroshnichenko / Pexels
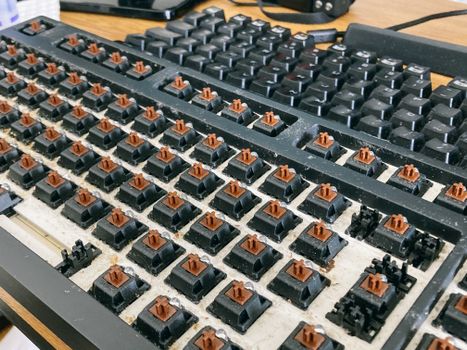 Photo: Athena Sandrini / Pexels
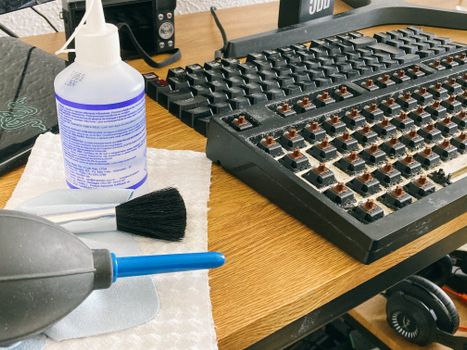 Photo: Athena Sandrini / Pexels
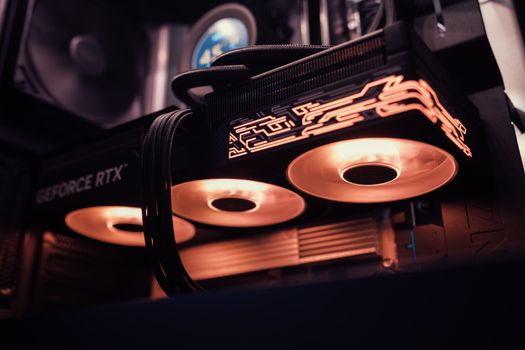 Photo: Matheus Bertelli / Pexels